First Storage
Learn how to create loading units, build a conveyor layout with racks, and set up storage search.
Preparation:
- Log In at Rackflow
- Expand your model from First Simulation or create a new one
- Save your progress after each step.
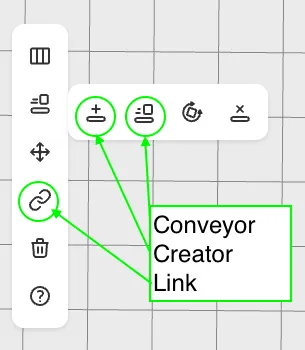
Create Conveyor System
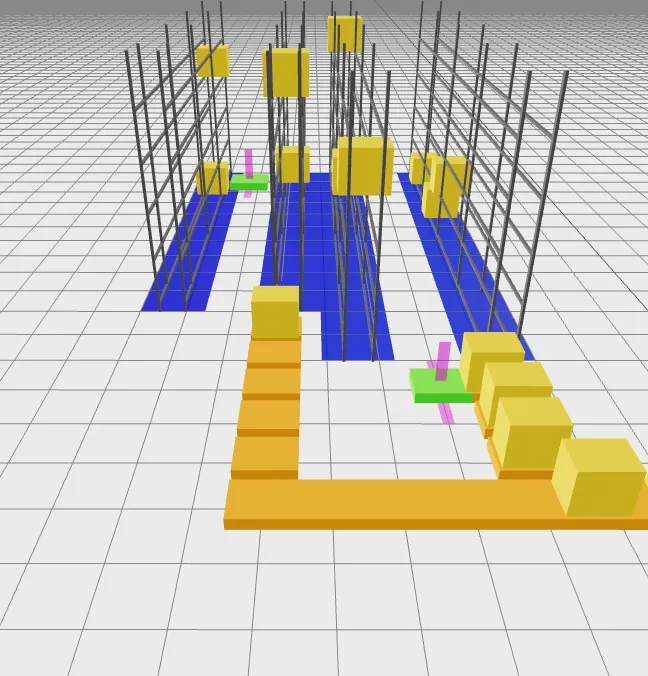
Section titled “Create Conveyor System”Build a conveyor system with Creators, Conveyors and Links between them. The Creator generates loading units. Link arrows show direction; loading units currently stop at endpoints. Later, connect these ends to racks using a storage and retrieval machine (SRM).
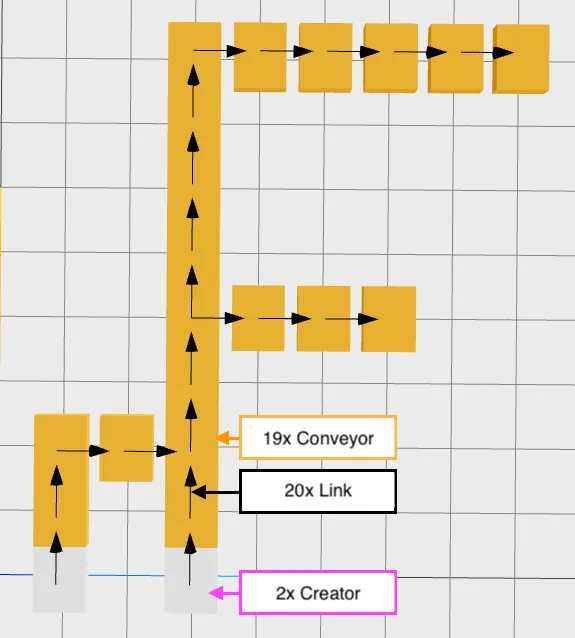
Copy the layout below or design your own.
Define Racks
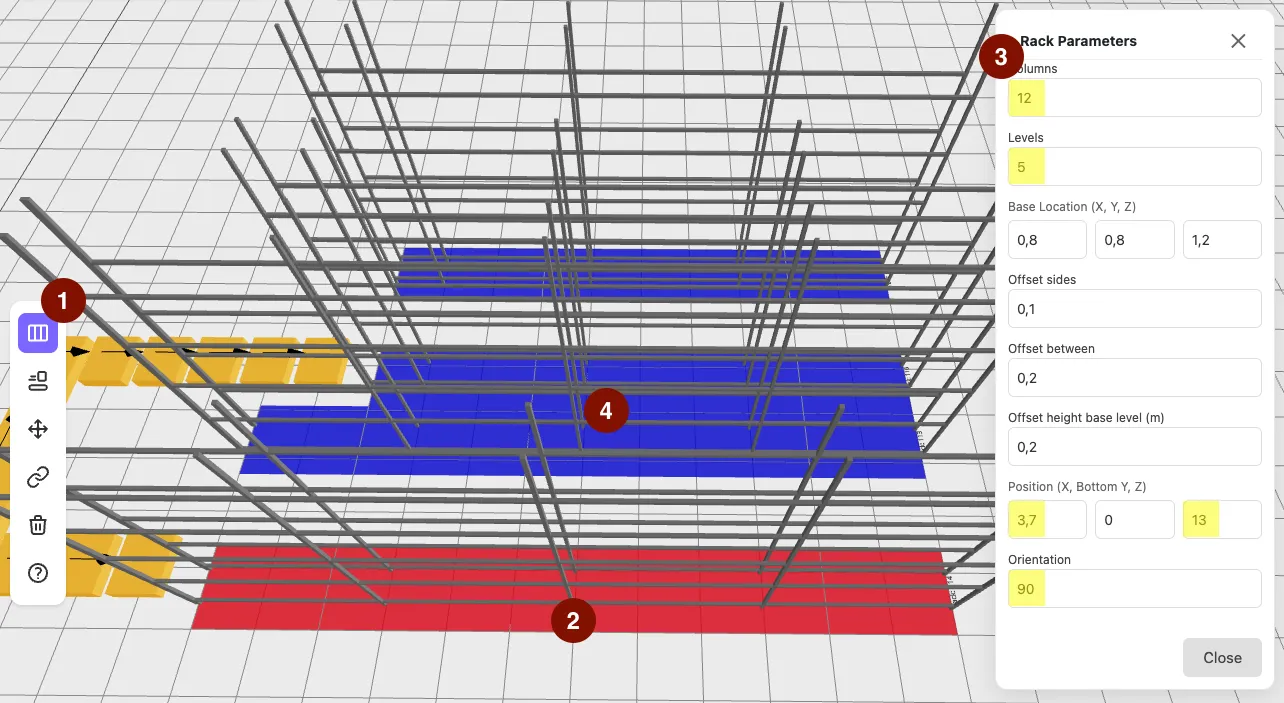
Section titled “Define Racks”- Select the rack tool from the toolbar.
- Click on the plane to place it; the rack centers at the click position.
- Set storage places: columns for length, rows for height. Refine position with X and Z coordinates (Y is fixed on the ground). Rotate by setting orientation to 90°.
- Repeat steps 1-3 for additional racks.
See racks for details. Save explicitly using the disk icon.
Add Storage and Retrival Machines
Section titled “Add Storage and Retrival Machines”The SRM moves along horizontal and vertical axes to place loading units in racks.
- Select SRM from the toolbar.
- Place it near the target racks and handover conveyor.
- Set speeds: 2 m/s for horizontal (travel) axis, 1 m/s for vertical (lift) axis.
- Switch to Linking Mode in the toolbar. Connect the final conveyor to the SRM, then the SRM to both racks.
- Repeat for the second SRM.
Save the progress.

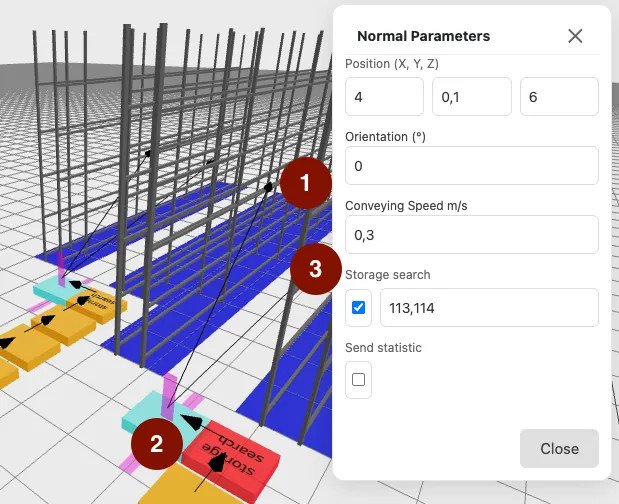
Add Storage search
Section titled “Add Storage search”Loading units need a target storage location to enter racks. Configure storage search on the conveyor before the aisle.
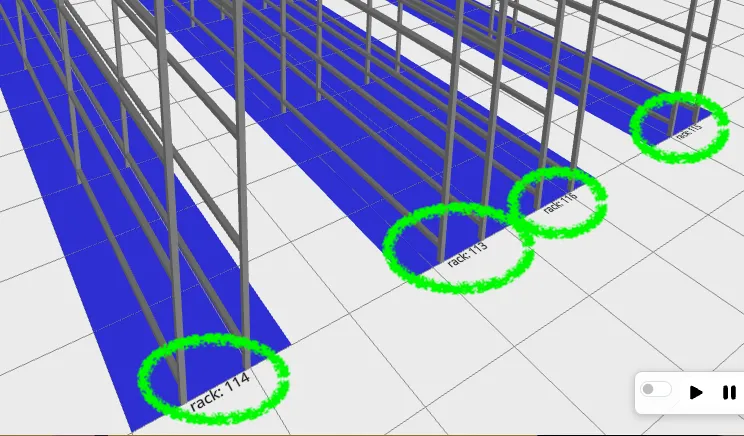
- Note rack IDs (e.g., 113 and 114 for the first aisle; yours may differ).
- Select the conveyor in front of the aisle.
- Enable Storage Search and enter target rack IDs (e.g., 113, 114).
- Repeat for the second aisle with its rack IDs.
Save again 💾
Start and Test the Simulation
Section titled “Start and Test the Simulation”Switch to Simulation Mode and run for a few minutes. Verify each rack receives one loading unit.
Congratulations 🎉
Section titled “Congratulations 🎉”Your warehouse is now loading.